Continuous Integration
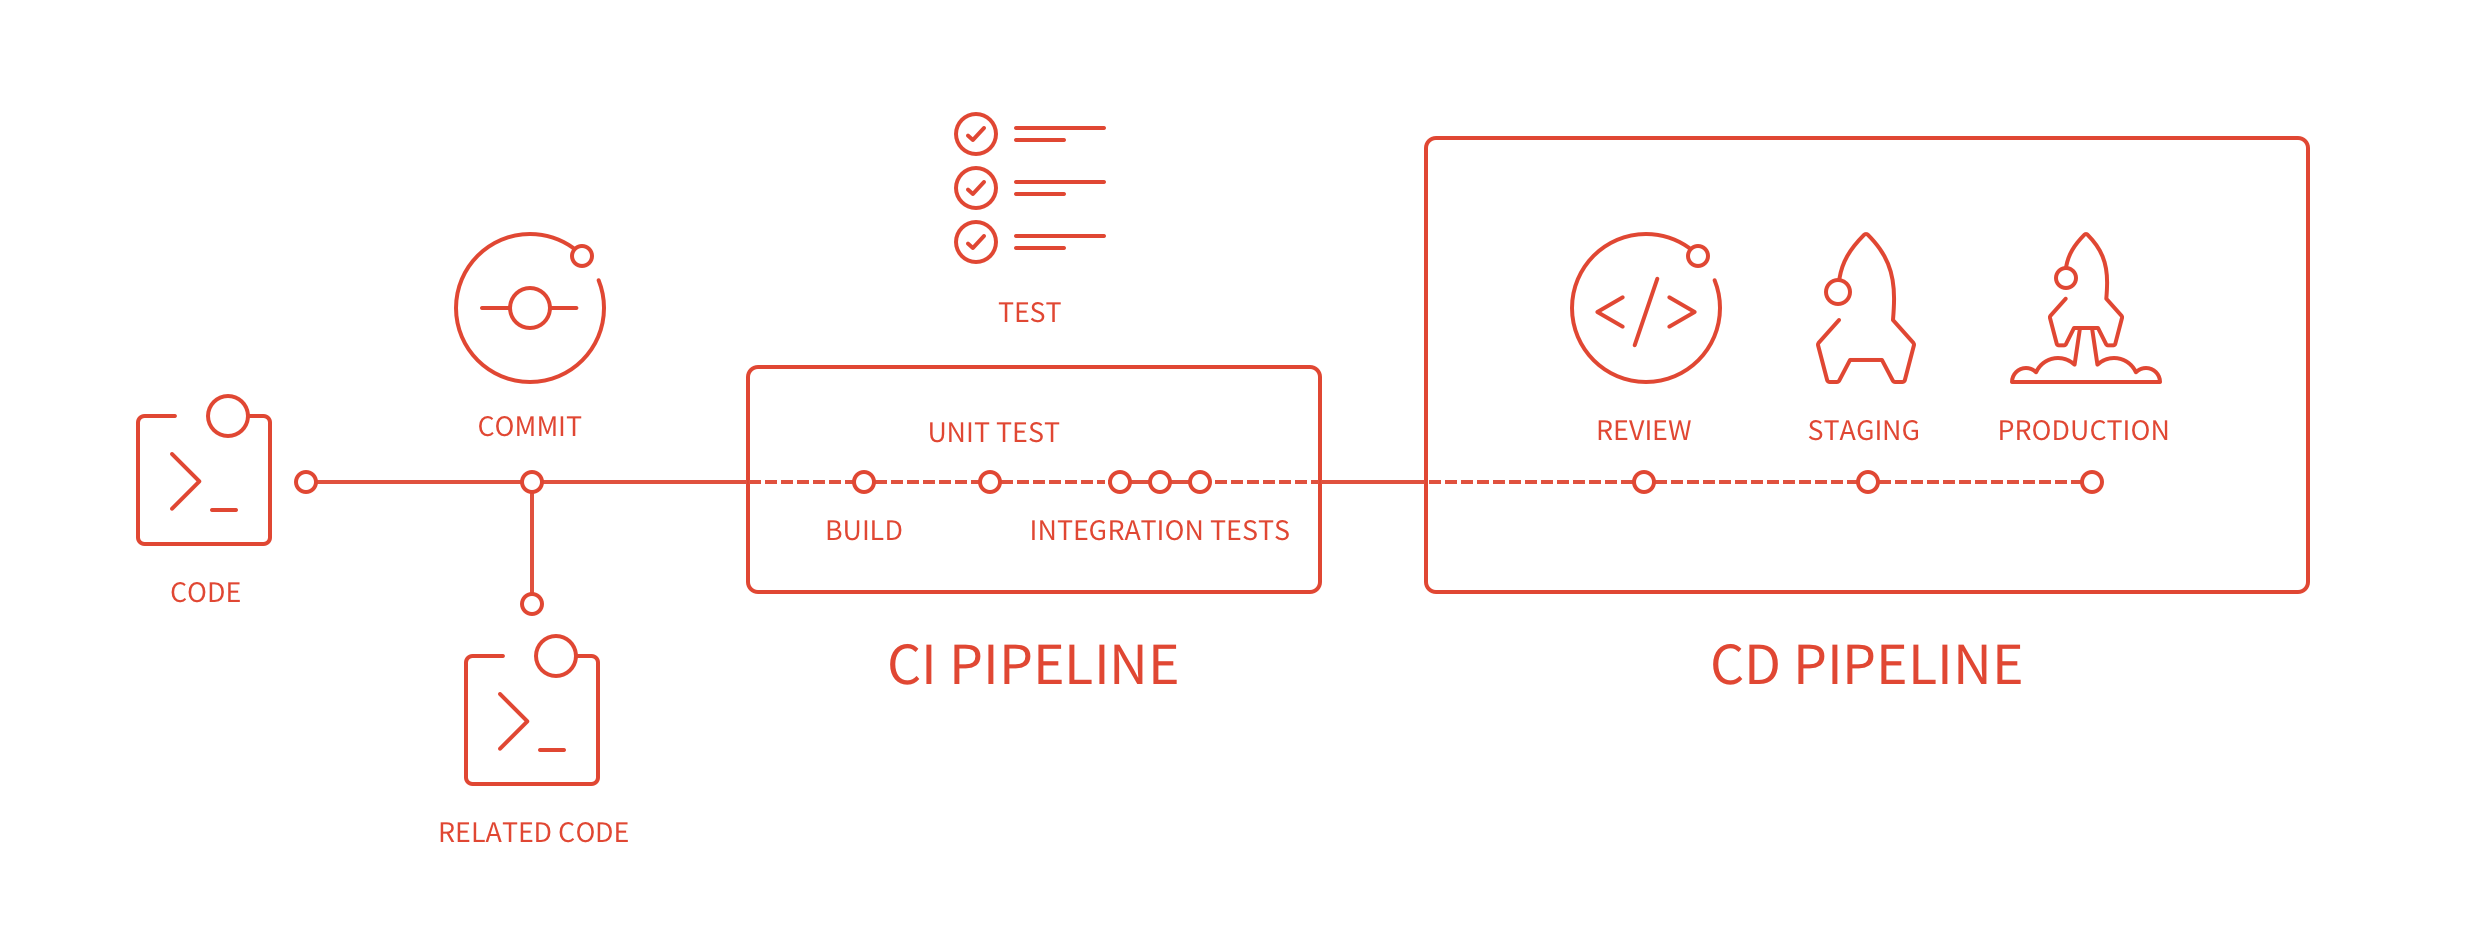
Continuous Integration (CI) is the process of systematic code testing to ensure that changes made to a codebase do not break existing functionality. Although, firming entrenched into the software development lifecycle research projects rarely takes advantage of this important step. While this may be overkill for single-owner projects that are relatively small, any collaborative project of a reasonable size needs regular testing to avoid absolute pandemonium. A typical example in an academic setting is a Professor who has a research codebase, ideally version controlled and hosted on an accessible server, with students who contribute to this codebase. CI can be used to ensure that code that is committed to the central repository does not break functionality that existed in the code or new changes made by others.Tests, named unit tests, are written to ensure that various ‘unit elements’ of the code function as intended. CI consists of a suite of tests that are run every time the code is committed. If the CI tests fail, the developers are made aware of this immediately as opposed to having ignominiously discovered by their colleagues! Let us see what an ideal development lifecycle would look like:
GitLab (https://about.gitlab.com/) is a popular website that hosts ‘Git’ projects and offers various levels of service tiers. Most people will be delighted to hear that they offer a free version, this is subject to some limitations. GitLab also offers CI built into their environment to make testing easy for their users. While there are several platforms out there that offer this service, I chose GitLab for this illustration purely for ease of use. The example that I show below will have a Python codebase for a Laplace solver, however the steps are applicable for any language.
- Step 1 would be creating an account on GitLab and pushing your project. If you have an existing project, the following is how you would push your project to GitLab:
cd existing_folder
git init
git remote add origin https://gitlab.com/YOUR_USERNAME/test_dash_app.git
git add .
git commit -m "Initial commit"
git push -u origin master
- At the end of step 1, you should have your files on the remote server. If you navigate to GitLab and your project, on the left pane you will see ‘Repository’. If you hover over it, you should ‘Files’ and clicking on it will take you to all the files you just pushed to the server. What we really want to do, however, is set up put CI tests. Go back to the main project page and click on ‘CI/CD’ in the left pane. This will automatically select the sub-element ‘Pipelines’ and take you to that page. Currently this should be empty. Now to create a CI ‘pipeline’ you need to do the following two steps:
- Add a .gitlab-ci.yml to the root of your repository.
- Configure a runner.
- Let us go ahead and look at what a .gitlab-ci.yml file is. This is a YAML file that tells GitLab what tests to run and how to run them. This resides in the root folder of your project. An example .gitlab-ci.yml file for a Python project is shown below.This simply runs the site creator script 'hugo' for GitLab pages, you can of course customize this to run your jobs in any language.
# All available Hugo versions are listed here: https://gitlab.com/pages/hugo/container_registry
image: registry.gitlab.com/pages/hugo:latest

test:
  script:
  - hugo
  except:
  - master

pages:
  script:
  - hugo
  artifacts:
    paths:
    - public
  only:
  - master
-
In the above script, there are two jobs that are being run named 'test' and 'pages'. Each of these jobs are a top-level element that needs to have the 'script' element underneath it. The line 'hugo' tells the runner to execute that command on the files in the root repository. If you want to generate a website using GitLab pages, it is important to use the 'pages' top-level element.There is a tool named 'Lint' on the top right hand corner of your CI/CD page if you want to check your .gitlab-ci.yml for correctness.
- Once you have created your .gitlab-ci.yml file, commit it and push to the remote repository as shown below:
git add .gitlab-ci.yml
git commit -m "Add .gitlab-ci.yml"
git push origin master
- On the CI/CD page you will notice now that the job is running on a Runner, which is simply a machine that is dedicated to running your tests/jobs. Once it is complete you should see whether your job passed or failed your test. In the case of the example above if 'hugo' did not not execute correctly, you should see a failed comment with a red cross next to your job and a green check if it did execute correctly as shown below:

One final word on Runners, GitLab gives you a free quota of 2000 mins on public hosted machines to run your CI jobs. Any mpre than that requires updates to paid subscriptions. One way around that is to set up your own Runners. This is easier than one might imagine, if you have access to a server that is great, if not you can setup your own laptop/desktop to be a Runner for your project. There a several ways to do this, for more information go to this page on GitLab Runners.